Step 5 - Screeding Sand Bed
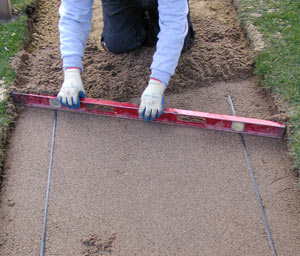 Carefully spread bedding sand around and between the screed bars to form a setting bed for the paving stones. Screed the sand by drawing a 2" x 4" board or other straight-edge across the top of the screed guides. Then remove the guides and use a trowel to fill in the voids with sand.
 Step 6 - Laying Paving Stones
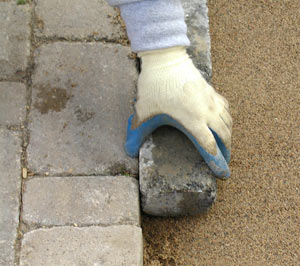
In general, lay the first paving stones against the longest section of edge restraint. If possible, start at the low end of the grade and work uphill to keep paving stones from shifting during construction. Select paving stones at random from different product pallets to get good color distribution. Work alternating from right to left, then left to right, completing one row at a time. String lines will help keep rows straight. Set the paving stones carefully into the sand; do not press or hammer them.
Place paving stones directly next to each other. The ribbed edges on the paving stones will ensure proper spacing. Continue adding paving stones until you’ve completed your pattern.
Note: When installing Circlestone, mark the center of the project area and begin laying paving stones in concentric circles from the center outward. See diagram in the Estimating Guide for proper placement of Circlestone components.
 Step 7 - Cutting Paving Stones
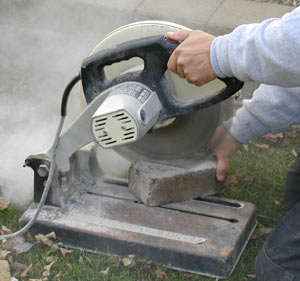
Paving stones may need to be cut to fit curves, corners and angles, or to go around objects. Mark the paving stones and cut them with a diamond-tip-blade masonry saw for the cleanest results.
A guillotine paving-stone splitter or mallet and chisel also may be used. Cut paving stones to fill any remaining gaps to maintain patterns. Gaps less than 3/8 inch can be filled with sand.
Click on image thumbnails to view larger versions